Getting StartedImprove this page
The following image shows an overview of your journey with Fidel API to using real-time transaction data to provide your users a seamless experience:
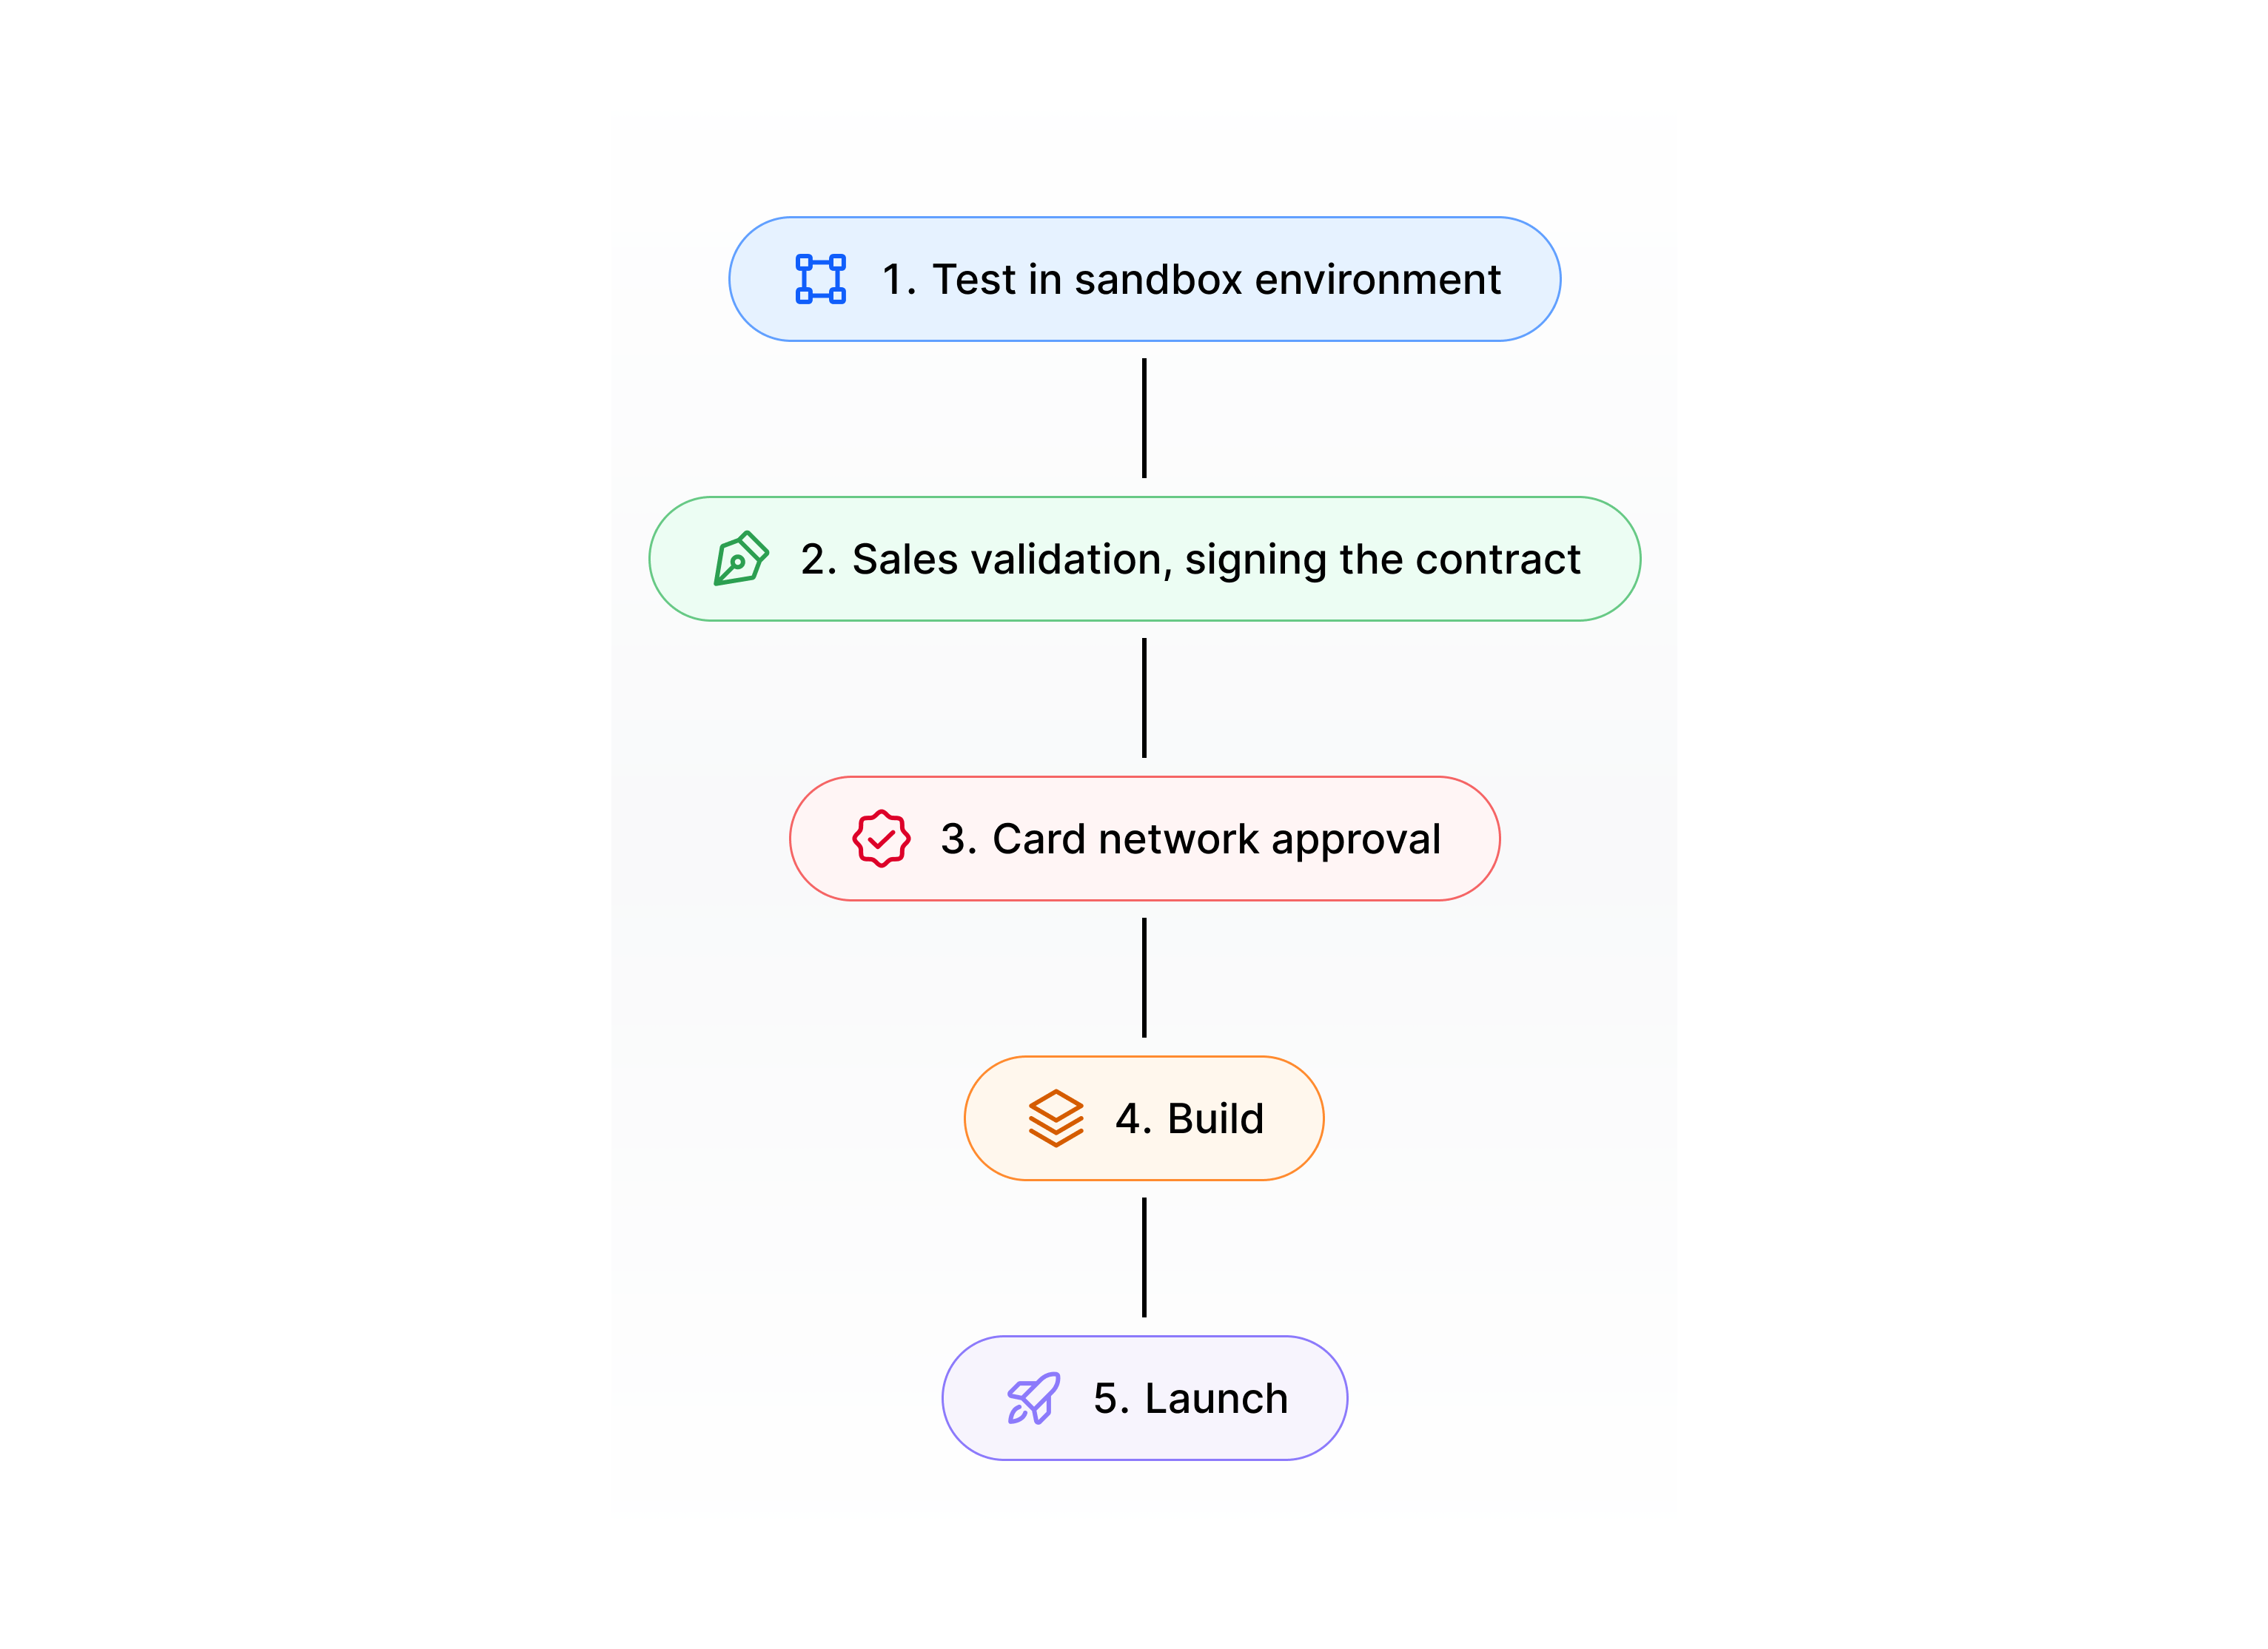
In a high-level overview, you will go through the following steps:
- Create a Fidel API account and explore the platform.
- Validate the feasibility of the solution with Fidel API's Sales team and sign the contract.
- Document your use case and your application for the card network's approval.
- Integrate your application with Fidel API's platform.
- Test your application with real transactions of test users.
- Launch your application to your audience.
This page describes how to get started with the first step: testing the platform in the sandbox environment.
Creating an Account
To get an understanding of the platform and its object models, create a Fidel API account. This account will give you access to the Fidel API dashboard, where you can configure your card-linked program and test how transactions are received.
Navigating on the Dashboard
The Fidel API dashboard is based on the following concepts:
- programs
- cards
- transactions
- webhooks
Programs are used to group cards and transactions. Webhooks allow you to react to transaction events of a certain program.

Note that the pages of Brands and Offers don’t play any role in the Transaction Stream API, they apply only to the Select Transactions API.
In each program you can see the cards, transactions and webhooks that belong to that program.

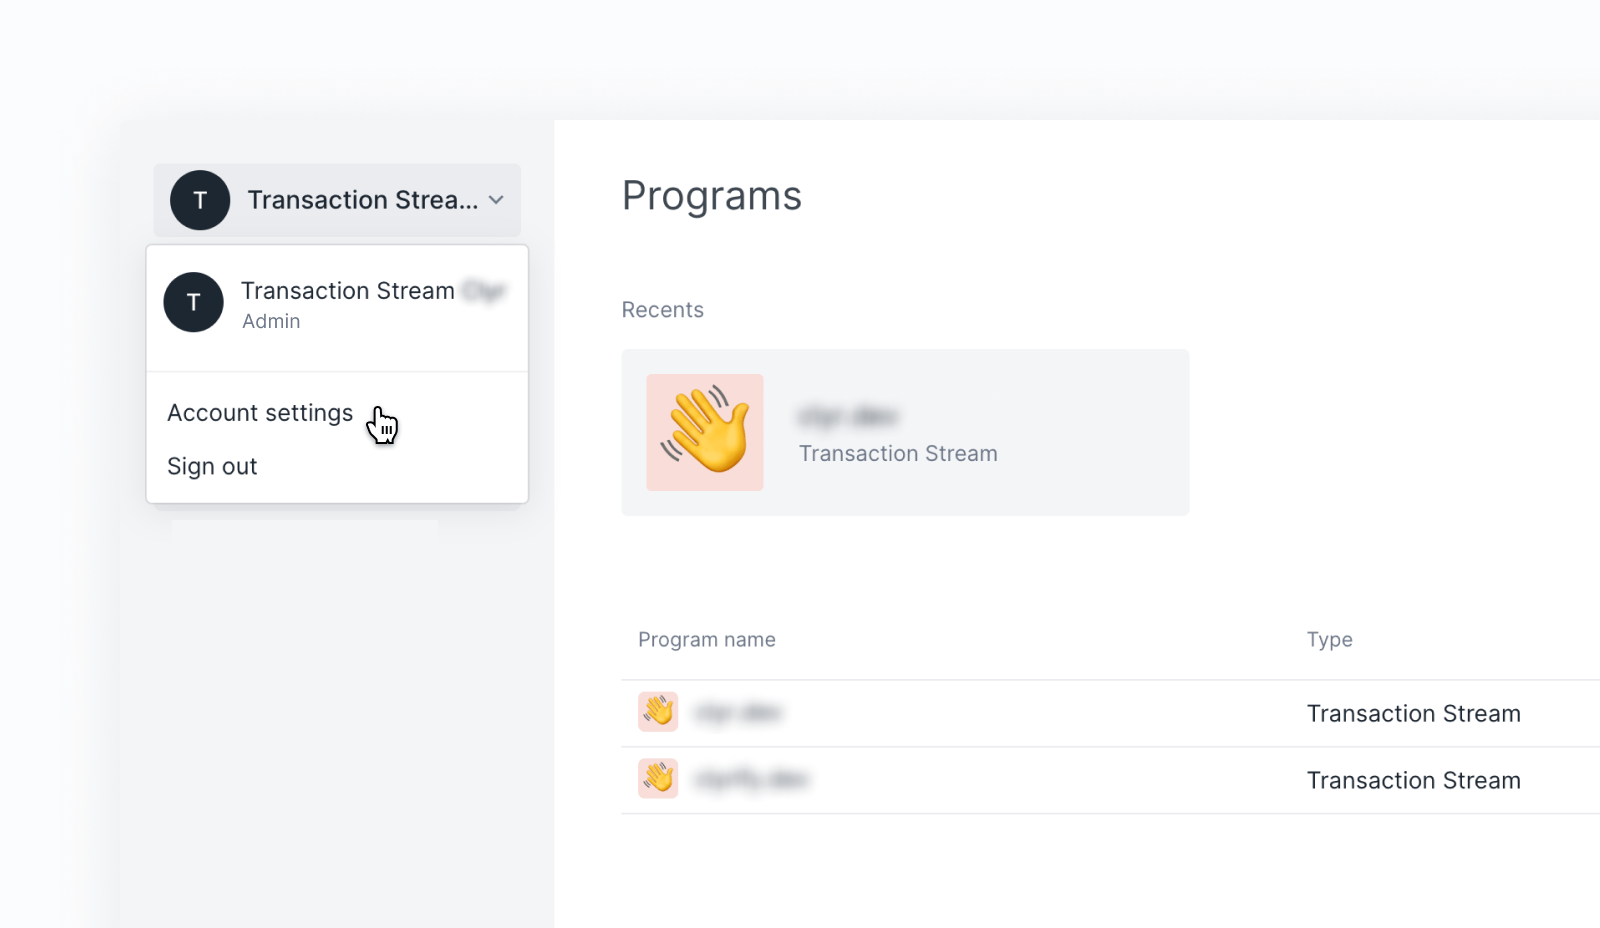
Account Settings
You can manage your Fidel API account in the Account settings page. To navigate there, open the drop-down menu next to your account name.
Under Account settings, you can find the following information:
- API version, developer keys
- Billing information (billing period, billing history)
- Users (inviting users, granting privileges)
- Security settings (password, card number obfuscation settings, etc.)
Configuring Your Account
This section walks you through creating a program and adding users to your account.
- When you first log in, you have a Demo Program created for you. However, that program is based on the Select Transactions API.
To start exploring the Transaction Stream API instead, use the New program button in the top right corner to create a new program. SelectTransaction Streamas the program type. - To add users, navigate to the Account settings page. You can find this option in the drop-down menu next to your account name. Then create the users:
- Select the Users tab and click on Invite users.
- Type the email address of the user, and select an account type (admin or developer).
- Click on the Invite button.
The user will receive an email with a link to sign up for a user account in your environment.
Testing Cards and Transactions
In test environments, you cannot use real-life cards and transactions. This is why you need to test the platform with Fidel API’s test cards. You can do so in the Playground page of the Fidel API dashboard. Read the Configuring Your Account section above to understand how.
Developers can also use the API endpoints and the Fidel API SDKs to link test cards to programs in the platform, and to simulate incoming transactions. Read the For Developers section to learn how.
The following sections walk you through linking a test card and creating a test transaction in the dashboard. It also shows how to clear test transactions.
Linking a Test Card
See how card linking and verification works by linking a test card to your program:
- Navigate to the Cards page, click the New card button.
- Read through the information about the card verification, and select Continue to start linking a test card.
- Fidel API provides a set of test cards that you can use to explore the product (only in the Fidel API platform, and only in test mode).
To link a test card of Fidel API, add the following card details. For other test card numbers, check the Test Card Numbers section.- Card number:
4444000000004000 - Expiry date: any date in the future
- Country of issue: United States
- Card number:
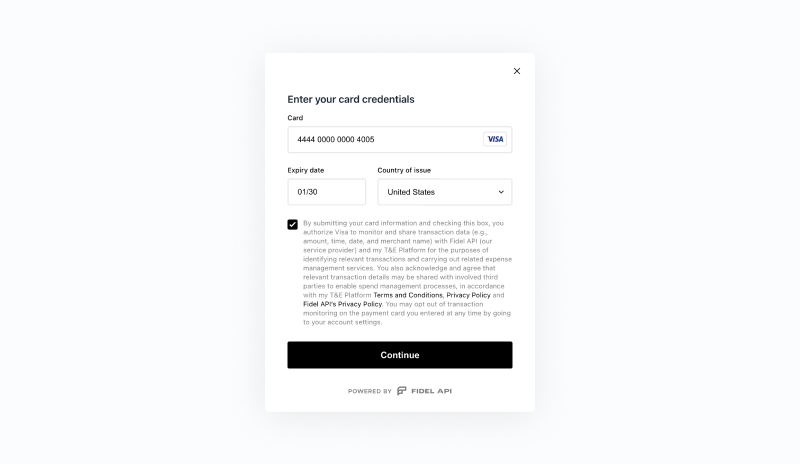
- Mark the checkbox to accept the terms and conditions, and click Next.
- To verify the card, type
0.67as the amount of the microcharge, and click Verify.
(In a real-life scenario, users get this value by accessing their bank account and checking the value of the microcharge from “Card Verification”. The microcharge should appear on the user’s account within a few minutes.)

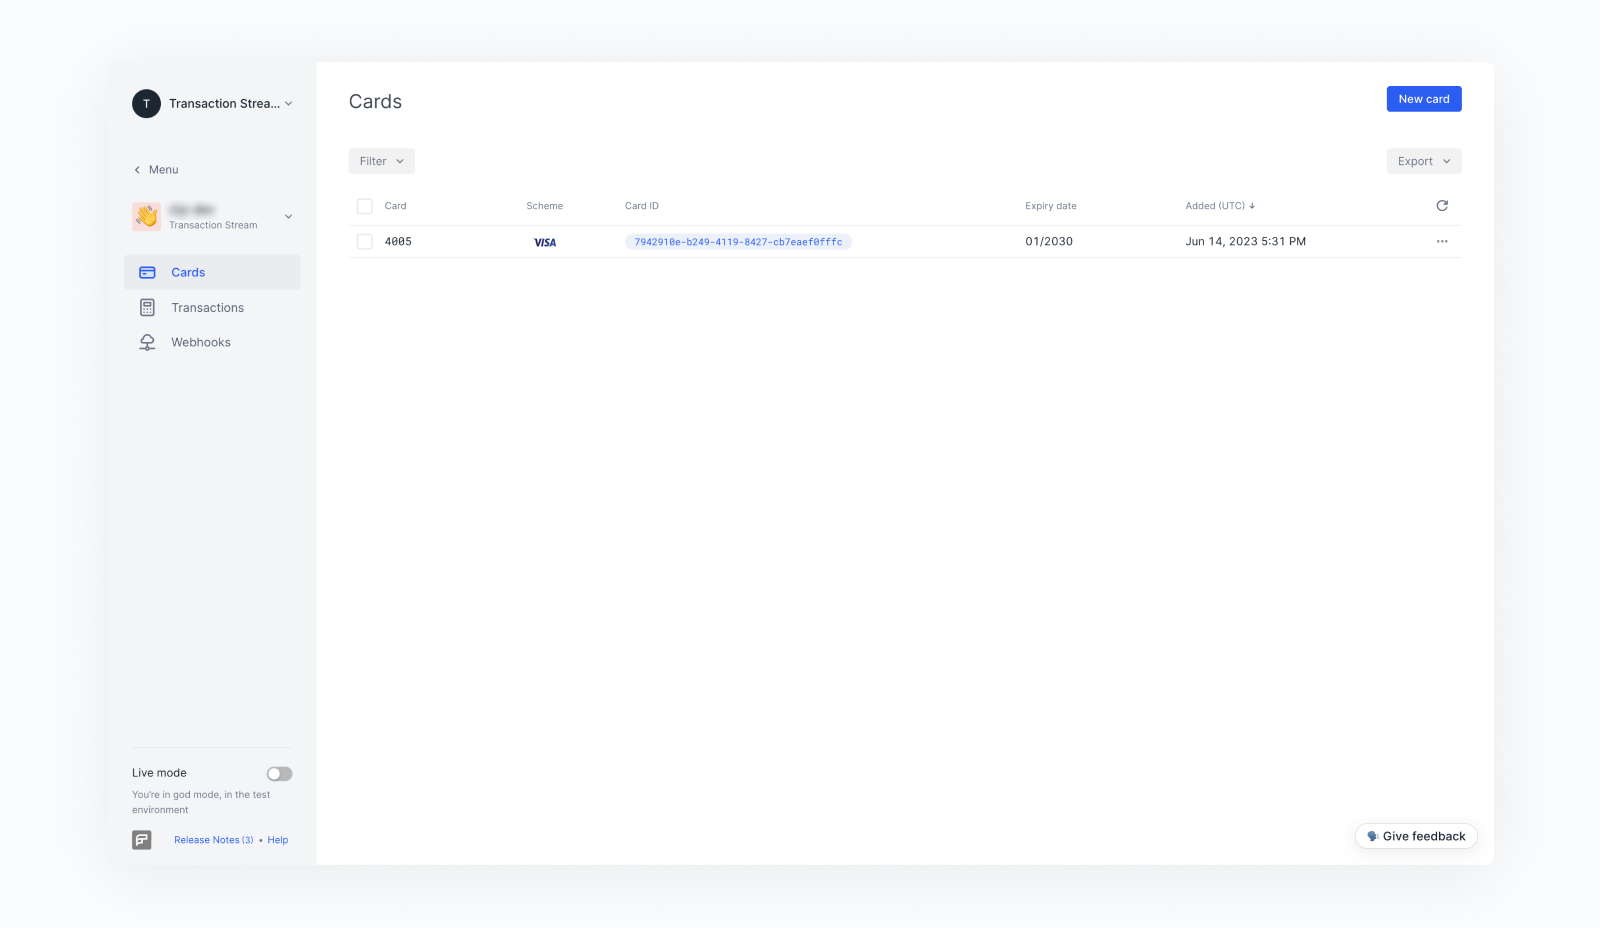
- After the successful card verification, the card will be displayed on the Cards page:
Creating a Test Transaction
To see how transactions look like in the Fidel API platform, complete the following steps:
- Navigate to the Playground.
- In the drop-down box, select
Transaction Stream. - Click on Create Transaction.
- Select the Program.
- Select the Card you created previously.
- Click Run and a test transaction will be created.
- Check the transactions you just created:
- Navigate to Programs and select your program.
- Click Transactions.
- Observe the list of transactions you created in the previous step.
- Click on one of the transactions and observe the transaction details.
You can read about each data field here.
- Close the Transaction details section to go back to the transaction list.
As you can see there, new test transactions are waiting for authorization. Simulate the clearing by selecting the … menu and then clicking Clear.
![]()
Test Card Numbers
For security purposes, the Fidel API test environment doesn't accept live card numbers. Fidel API has a range of test card numbers you can use while integrating or testing the API: 4444000000004*** where * can be any digit. For example, 4444000000004278 is a valid test card number. The test card numbers work in the Playground, with the Fidel API SDKs and with the Cards APIs.
When linking a Fidel API test card, type in $0.67 for verification.
For Developers
Get API keys
On the Account page you will find two SDK and two API keys. The SDK keys are used to link the web and mobile SDKs to your account and the API keys enable you to access the API endpoints directly. Use the test keys to access the test environment data, and live keys to access the live environment data.
Note that due to security reasons, the secret API key should not be used in a mobile application or a front-end web app.
When you're ready to go live with your integration and test with credit/debit cards, you can request access to the live keys by clicking the Upgrade to go live button at the bottom left of the dashboard.
Create a Test Transaction with the API
If you have a program and a card linked to it, you can use the /transactions/test endpoint to create a test transaction.
12345678910curl -X POST \
  https://api.fidel.uk/v1/transactions/test \
  -H 'content-type: application/json' \
  -H 'fidel-key: sk_test_**************************' \
  -d '{
    "amount": 10,
    "cardId": "eb54205c-5827-47cf-8444-1e2f125837e4",
    "currency": "USD"
    }'
Install SDKs
You can use the web and mobile SDKs to link your user's card to your program without having to implement additional security measures on your server-side code. The tutorial walks you through the necessary steps to start using the APIs and SDKs.
Learn how to use the SDKs in your applications, how to customize the UI and capture card details securely on your website or mobile applications.
Check the Programs, Cards, Transactions and Webhooks sections to get an overview of the Transaction Stream API object structure.
Learn More
- Read more about the objects of the platform: Programs, Cards, Transactions and Webhooks
- Walk through our tutorial to start using the APIs and SDKs
- Learn about the SDKs
- Check out the API reference docs